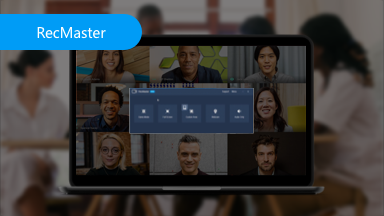
How to Record Screen on Gateway Desktop?
Are you using a Gateway desktop and wondering how to record your screen? This article is for you! We’ll walk you through the process on how to record screen on Gateway desktop using RecMaster, a powerful screen recording software.
Screen recording has become a must-have tool for many purposes—whether you’re creating tutorials, delivering presentations, capturing gameplay, or troubleshooting software issues. If you’re working with a Gateway desktop, RecMaster provides a simple, powerful, and flexible solution to help you achieve high-quality screen recordings effortlessly. With its intuitive interface and robust features, RecMaster makes it easier than ever to record your screen with precision and clarity.
;rgba(153,153,153,0.1);rgba(153,153,153,0.5)" dur="2s" repeatCount="indefinite" /></rect></svg>)
Table of Contents
Why Choose RecMaster for Screen Recording on Gateway Desktop?
1. User-Friendly Interface
RecMaster is built for ease of use, making it the ideal choice for anyone, regardless of technical skill. With its intuitive interface, you can start recording your screen instantly with just a few clicks. Whether you’re a beginner looking for a hassle-free solution or a professional needing reliable, high-quality recordings, RecMaster delivers the perfect balance of simplicity and performance to meet all your screen recording needs.
2. High-Quality Recording
With RecMaster, you can effortlessly capture high-definition videos, guaranteeing that every detail on your screen is recorded with crystal-clear quality. Supporting up to 4K resolution, it’s the perfect solution for professional presentations, tutorials, and any project that demands top-tier video clarity. Whether you’re showcasing your expertise or creating content for your audience, RecMaster ensures your recordings always look their best.
3. Versatility in Recording Modes
Whether you’re looking to capture your entire screen, a specific area, or even record from your webcam, RecMaster offers a variety of flexible recording modes tailored to your needs. It also includes dedicated features for game recording and audio-only captures, ensuring you have the perfect tool for any recording scenario. No matter your project, RecMaster adapts to deliver exactly what you need, when you need it.
System Requirements for RecMaster to Record Screen on Gateway Desktops
Operating System Compatibility
RecMaster is fully compatible with Windows 11, 10, 8, and 7, ensuring smooth and reliable performance across multiple versions. For the best experience, simply make sure your system is running one of these supported versions. With RecMaster, you can maximize your screen recording potential without any compatibility issues.
Hardware Specifications
- Minimum: 2GB RAM (4GB or more recommended for better performance)
- Storage: Sufficient free space to save recordings
- Processor: Intel i3 or higher for smooth recording
Software Prerequisites
Ensure that your system’s graphics drivers are up to date to avoid any compatibility issues.
Downloading and Installing RecMaster to Record Screen on Gateway Desktop
Step-by-Step Installation Guide
- Download the Installer: Visit the official RecMaster website and download the version suitable for your Windows system.
- Run the Installer: Locate the downloaded file and double-click to run it.
- Follow the Prompts: The installation wizard will guide you through the setup process. Accept the license agreement and choose installation preferences.
- Complete Installation: Click ‘Install’ and wait for the process to complete. Once done, click ‘Finish’ to exit the installer.
;rgba(153,153,153,0.1);rgba(153,153,153,0.5)" dur="2s" repeatCount="indefinite" /></rect></svg>)
;rgba(153,153,153,0.1);rgba(153,153,153,0.5)" dur="2s" repeatCount="indefinite" /></rect></svg>)
Initial Setup and Configuration
After installing RecMaster, simply launch the application to get started. You’ll be prompted to choose your preferred recording mode, allowing you to tailor your experience from the get-go. If you’d like to customize your output folder for saving recordings or adjust settings such as output formats, just navigate to Menu > Settings. Easily tweak these options to fit your needs, ensuring your recordings are saved exactly the way you want them..
;rgba(153,153,153,0.1);rgba(153,153,153,0.5)" dur="2s" repeatCount="indefinite" /></rect></svg>)
Navigating the RecMaster Interface
Overview of Main Features
Upon launching RecMaster, you’ll instantly have access to a variety of recording modes, settings, and a convenient list of your previous recordings. The sleek, user-friendly layout ensures that every feature is just a click away, allowing you to start recording quickly and efficiently without any hassle. With RecMaster, everything you need is right at your fingertips for a seamless recording experience.
Customizing Settings
Click the ‘Settings’ icon to quickly adjust essential parameters like video format, frame rate, and audio sources. Customizing these settings allows you to fine-tune your recording experience, ensuring you achieve the highest quality that meets your specific needs.
Understanding the Toolbar
The toolbar gives you instant access to start, pause, and stop recordings with just a click. It also offers powerful annotation options, enabling you to easily highlight or mark specific areas during your recording to emphasize key points and enhance clarity.
;rgba(153,153,153,0.1);rgba(153,153,153,0.5)" dur="2s" repeatCount="indefinite" /></rect></svg>)
Choosing the Right Recording Mode to Record Screen on Gateway Desktop
RecMaster offers several recording modes to cater to different needs:
- Full-Screen Recording: Captures the entire screen, ideal for comprehensive tutorials or presentations.
- Custom Area Recording: Allows you to select and record a specific portion of the screen.
- Game Mode: Optimized for recording gameplay, ensuring high-quality video without compromising performance.
- Webcam Recording: Enables recording from your webcam, perfect for vlogs or online presentations.
- Audio-Only Recording: Captures only system audio or microphone input, suitable for podcasts or voiceovers.
- Program Window: Records the selected program window without being disturbed by other windows covering on it. The selected window should not be resized or minimized during the recording.
- Follow Cursor: To record a specific area around the moving cursor, you can choose this mode.
Configuring Recording Settings
Selecting the Output Format
Choose from formats like MP4, AVI, or FLV. MP4 is widely used due to its balance between quality and file size. (Menu>> Settings>> File)
;rgba(153,153,153,0.1);rgba(153,153,153,0.5)" dur="2s" repeatCount="indefinite" /></rect></svg>)
Adjusting Frame Rates
Higher frame rates (e.g., 60 fps) result in smoother videos but larger file sizes. Adjust according to your needs and storage capacity. (Menu>> Settings>> Video)
;rgba(153,153,153,0.1);rgba(153,153,153,0.5)" dur="2s" repeatCount="indefinite" /></rect></svg>)
Setting Up Audio Sources
After selecting a recording mode, you will have the options to select the System Sound or Mocrophone devices. Decide whether to capture system sounds, microphone input, or both. Ensure that the correct devices are selected in the settings.
;rgba(153,153,153,0.1);rgba(153,153,153,0.5)" dur="2s" repeatCount="indefinite" /></rect></svg>)
Enabling/Disabling the Cursor Display
Including the cursor can be helpful for tutorials. Toggle this option based on whether you want the cursor visible in your recordings. If you don’t hope to include it, you can disable it by going to Menu>> Settings>> Cursor.
Starting a Screen Recording Session
Initiating the Recording
Select your desired recording mode and click the ‘Start’ button or Alt + 1. A countdown will appear, giving you a moment to prepare.
;rgba(153,153,153,0.1);rgba(153,153,153,0.5)" dur="2s" repeatCount="indefinite" /></rect></svg>)
Using Hotkeys for Control
RecMaster empowers you to use customizable hotkeys to start, pause, and stop recordings, delivering a seamless recording experience without the need to navigate the interface. You can easily modify these hotkeys in Menu > Settings > Hotkeys to suit your preferences, ensuring smooth and efficient control throughout your recording process.
Pausing and Resuming Recordings
If you need to take a break or adjust something on your screen, you can pause the recording and resume when ready, ensuring a smooth final video.
Editing and Annotating Your Recordings
Built-In Editing Tools
After recording, RecMaster offers basic editing features such as trimming, cutting, and merging clips, allowing you to refine your video without needing additional software.
Adding Annotations and Highlights
During recording, you can add annotations like text, arrows, or shapes to emphasize points or guide viewers, enhancing the instructional quality of your videos.
Trimming and Cutting Unwanted Sections
Remove any unnecessary parts of your recording to ensure a polished final product.
;rgba(153,153,153,0.1);rgba(153,153,153,0.5)" dur="2s" repeatCount="indefinite" /></rect></svg>)
Saving and Sharing Your Recordings
Saving in Different Formats
RecMaster offers the flexibility to save your recordings in a variety of formats, ensuring compatibility with different devices and platforms. This versatility helps you easily share your content across various channels without worrying about format issues.
Uploading to Video Platforms
Effortlessly upload your recordings to popular platforms like YouTube, Vimeo, or Google Drive directly from RecMaster, streamlining the process and saving you time.
Sharing via Social Media
Quickly share your screen recordings on social media platforms, instantly expanding your reach and connecting with a larger audience. With just a few clicks, you can promote your content and drive engagement.
Troubleshooting Common Issues
Low-Quality Video Output
- Check your recording settings and increase the resolution or frame rate to enhance video quality.
- Ensure sufficient system resources are available to support smooth and high-quality recording performance.
Audio Not Recording Properly
- Verify that the correct audio input and output devices are selected to ensure clear sound capture.
- Check microphone permissions and system sound settings to guarantee proper audio input.
Lagging or Stuttering in Recordings
- Close unnecessary background applications to free up valuable system resources and improve recording performance.
- Lower the recording resolution or frame rate to reduce CPU load and achieve smoother recordings.
Final Thoughts
ecMaster is a powerful and user-friendly screen recording tool designed for Gateway desktops. Whether you’re capturing tutorials, gameplay, or presentations, its versatile features guarantee a seamless and efficient recording experience. By following this guide, you’ll unlock the full potential of RecMaster, enabling you to create professional-quality screen recordings with ease and precision.
If you’re searching for a dependable and efficient screen recorder, download RecMaster today and start capturing your screen like a pro! With its powerful features and easy-to-use interface, you’ll be up and running in no time, creating high-quality recordings effortlessly.
FAQs
1. Can I record both system audio and microphone input simultaneously?
Yes, RecMaster allows you to record both system audio and microphone input at the same time. Advanced audio settings can be found by pressing the Advanced option on the dropdown menu of System Sound and Microphone.
2. Does RecMaster support scheduled recordings?
Yes, you can schedule recordings to start automatically at a specified time.
3. Can I record in 4K with RecMaster on my Gateway desktop?
Yes, as long as your hardware supports 4K recording, RecMaster can capture high-resolution videos.
4. Does RecMaster include a free trial?
Yes, RecMaster offers a free trial with limited features. You can upgrade to the full version for unrestricted access.
5. Is RecMaster suitable for recording online meetings?
Absolutely! RecMaster is perfect for recording Zoom, Microsoft Teams, or Google Meet sessions with clear audio and video.
RecMaster
Screen recording made easy.
Record every moment on your PC or Mac within few clicks.
Download Download-
How to Screen Record Final Fantasy 7 Rebirth On PC?
-
How to Record Signal Calls on Windows and Mac?
-
How to Record Screen on Gateway Desktop?
-
How to Record Webcam in 9:16 Aspect Ratio on PC?
-
How to Screen Record Flash Games?
-
How Do I Record in 1080 x 1920 Dimensions on PC?
-
Can I Record a Meeting While Wearing Headphones on Computer?
-
Deleted the Wrong Video
-
How to Set Passwords for RecMaster with My Lockbox?
-
How to Screen Record on an ASUS VivoBook Laptop?
-
How to Record Black Myth: Wukong?
-
How to Record Filmzie on PC and Mac?
-
How to Create New Employee Onboarding Videos with RecMaster?
-
How to Make A Product Demo Video with A Screen Recorder

RecMaster – Record Every Moment on Your Computer Screen
Record 1080p or even 4K clips at 60fps to maintain the high quality still.
Flexible settings for mouse cursor effects, watermark and annotations.
Preloaded with recording scheduler, video editor. Allow one-click sharing.
Isabella Garcia
Isabella Garcia is an experienced editor for RecMaster, She currently concentrates on writing articles about gameplay recordings and also, How-to guide to regular recordings. Her article aims to provide users with more instructive information.
Related & Hot Articles
Subscribe to keep up with the latest software discounts , news, and updates.