Remote verbal communication is more directive than sending emails. Knowing this fact profoundly, Slack allows your team to build up meetings online with voice and video calls to achieve high-degree efficiency. During the whole process of explaining ideas, giving tutorials to a product, or imparting induction training, a Slack recorder is indispensable. Once you carry out Slack call recordings, every detail of your important meetings will be inscribed into your PC and you are free to replay them anytime.
Today, I am going to introduce two kinds of desirable online meeting recorders for you guys. One is the default recorder of Slack and the other one is a 3rd-party recorder. You might be confused ‘why I need another recorder once I get a free one within my hands’ reach?’. Well, please finish the content and the answer will reveal itself.
How to Do Slack Call Recording Without External Tools?
Since you may not be very familiar with Slack’s built-in recording function, here is a step-by-step tutorial for you. If you have already an advanced user of Slack, please jump to the conclusion of this part where some advantages and disadvantages will be analyzed.
Steps:
- Log-in to your account.
- Under the ‘Direct messages’, choose a channel or a contact.
- Click on the orange Hippo Video.
- Press the button ‘Record with Screen Recording’.
- Click the button – ‘Start recording’.
- Determine whether you want to share your whole screen or just the app overlay. Click on ‘Share’ and your video recording officially begins now.
- Annotate your recordings
- When you feel like ending your recording, click on ‘Finish Recording’.
- You can edit your videos, share your videos when every procedure are finished.
(Make sure you have checked the ‘screen’ and ‘mic’ options or the system sounds and microphone sounds from your meeting will be improperly captured. And also, if you need a webcam to display your talking head, check the webcam option too.)
Advantages:
1. Free function charging no money.
2. High degree of security –
Slack will not record or transcribe any calls of yours. Though the metadata (the title of your meeting call, the channel and direct message where your calls start, the launcher of your meeting call, and some occasion happening in your meeting.) of some calls are stored.
Disadvantages:
1. The high video quality of your meeting recording cannot be promised.
2. Slack offers no function that is relevant to an auto recording.
3rd-party Slack recorders normally are more powerful and have more features. Using this kind of software promises the quality of the video. What’s more, users will have no worries about recording restrictions anymore.
Do Slack Call Recording with a Professional Third-Party Screen Recorder
The most convincing advantage of the 3rd-party recorder winning over Slack default recorder is that it bears higher quality and more useful features that could help to record.
You need a 3rd-party recorder to produce high-quality recordings of your online Slack meetings with intact, crisp sounds and rare latencies. RecMaster is such a kind of recorder that fulfills all your wishes.
Here is how we record meeting calls with RecMaster.
1. Download RecMaster and install it.
2. Set up RecMaster before you Launch or join a Slack meeting.
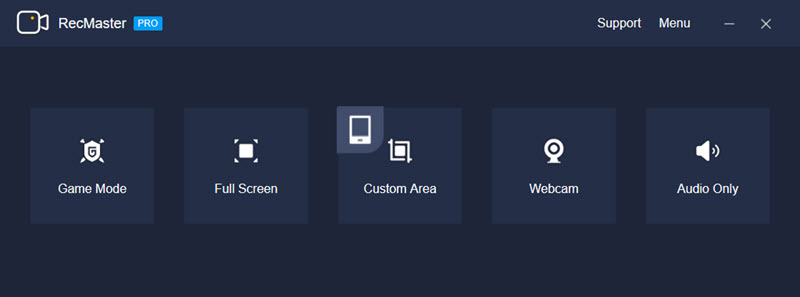
The first thing to do is choosing a recording mode. Here Full-Screen Mode and Custom-Area Mode are recommended. By the way, if you want to record meeting sounds only, you are suggested to use the Audio-Only Mode.

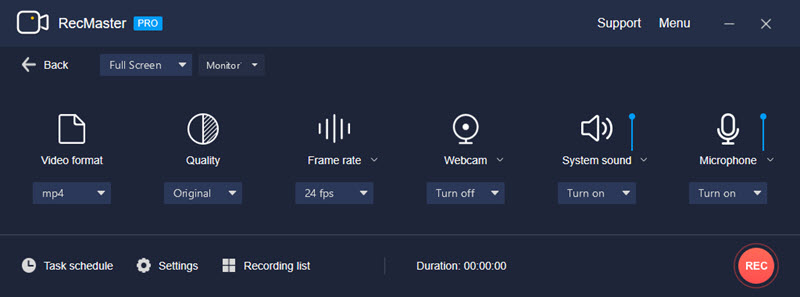
3. Now for creating higher quality videos, we should further configure the options.
Some options are really important that we must pay enough attention to them. They are the Video Format, Video Quality, Frame Rate, and Audio Sources.
To do Slack call recording, video quality is recommended to set as Original Quality. The FPS should be set at 30 FPS. There are 3 video formats offered for users – AVI, FLV, and MP4, choose one according to your needs as well as the Audio sources options.

4. Start recording by clicking on the REC button. If you need to highlight the video, the annotation tools are helpful.
5. Stop recording and go to the Recording List to find your raw footage. A simple editor is waiting for you to visit and offer service to cut unwanted fragments of your videos.
Besides the common recording function, RecMaster has some useful features that help you record your Slack conferences.
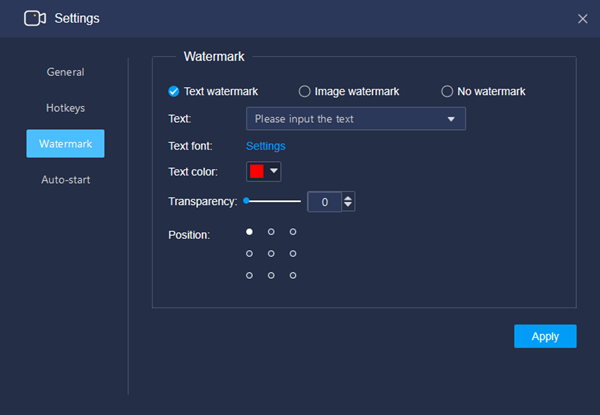
Normally we don’t advocate spreading the copies of any conferences, but once you have the demand, a tailored watermark will protect your videos from stolen or misuses.

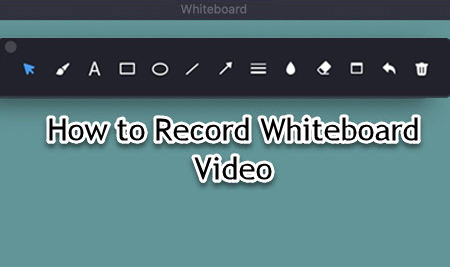
White Board is a tool in RecMaster’s annotation kit. You can take it as a blackboard, draw or write on it to better demonstrate yourself.

If one Slack meeting happens to contradict your timetable, then RecMaster’s Task Scheduler will save you from this dilemma.
Task Scheduler works as an automatic recorder that can record your screen automatically once you set it up before recording.
Final Words
An online meeting recorder is necessary. This passage introduces two recorders to do Slack call recording. One is Slack’s built-in recorder and another is a more powerful 3rd-party recorder. I am pretty sure the latter one suits most users’ demands, be they a meeting host or a meeting participant. Hope this article solves your problem.

RecMaster
Screen recording made easy.
Record every moment on your PC or Mac within few clicks.
Download Download-
How to Screen Record Final Fantasy 7 Rebirth On PC?
-
How to Record Signal Calls on Windows and Mac?
-
How to Record Screen on Gateway Desktop?
-
How to Record Webcam in 9:16 Aspect Ratio on PC?
-
How to Screen Record Flash Games?
-
How Do I Record in 1080 x 1920 Dimensions on PC?
-
Can I Record a Meeting While Wearing Headphones on Computer?
-
Deleted the Wrong Video
-
How to Set Passwords for RecMaster with My Lockbox?
-
How to Screen Record on an ASUS VivoBook Laptop?
-
How to Record Black Myth: Wukong?
-
How to Record Filmzie on PC and Mac?
-
How to Create New Employee Onboarding Videos with RecMaster?
-
How to Make A Product Demo Video with A Screen Recorder

RecMaster – Record Every Moment on Your Computer Screen
Record 1080p or even 4K clips at 60fps to maintain the high quality still.
Flexible settings for mouse cursor effects, watermark and annotations.
Preloaded with recording scheduler, video editor. Allow one-click sharing.
Related & Hot Articles
Subscribe to keep up with the latest software discounts , news, and updates.


